The words, side by side
The left column is what you would click or read in SOLIDWORKS Simulation; the right is where the same thing lives in MeshWeave. Names in MeshWeave say what the answer is rather than which textbook analysis it comes from, so a static study is called Strength and stiffness.
| In SOLIDWORKS Simulation | In MeshWeave |
|---|---|
| Study | A simulation, in the tree on the left of the project |
| Static study | Strength and stiffness |
| Frequency study | Vibration: the first six natural frequencies and their mode shapes |
| Buckling study | "Also check buckling" on Strength and stiffness: the load multiple and its shape |
| Thermal study (steady state) | Thermal, in the Flow & Thermal workspace: temperature map, hottest point and thermal resistance |
| Fatigue study | Repeated load, under Strength and stiffness options, from a force history and your S-N curve |
| Fixtures (fixed geometry) | Fixed support, placed on the part |
| External loads (force) | Load, placed on the part, with its force in newtons |
| Apply material | The Material row of the simulation |
| Mesh density slider | Quick, Standard or Detailed when you start the run |
| Factor of safety plot | The Safety factor chip, and Stress painted on the part |
| Displacement plot | The Maximum deflection chip, and the deflected shape |
Every answer here is a computer estimate for the loads, supports and material you entered. It is not a test of the real part, and a safety factor above 1 says nothing about impact, heat, or a load that comes and goes; that last one is what Repeated load is for, and it needs your own S-N curve, because there is no default.
Your first strength check
The order is the one you know: geometry, material, restraints, loads, run, read. What is different is that supports and loads are drawn on the part as coloured marks you click and drag, and a step that is missing turns its tree row red and stops the run, naming what is missing, before anything is charged.
- On the home page press New project, then Choose a file… and pick your part (a STEP file keeps its true shape best). Show me in the app
- In the tree on the left press + on Simulations and create Strength and stiffness. Show me in the app
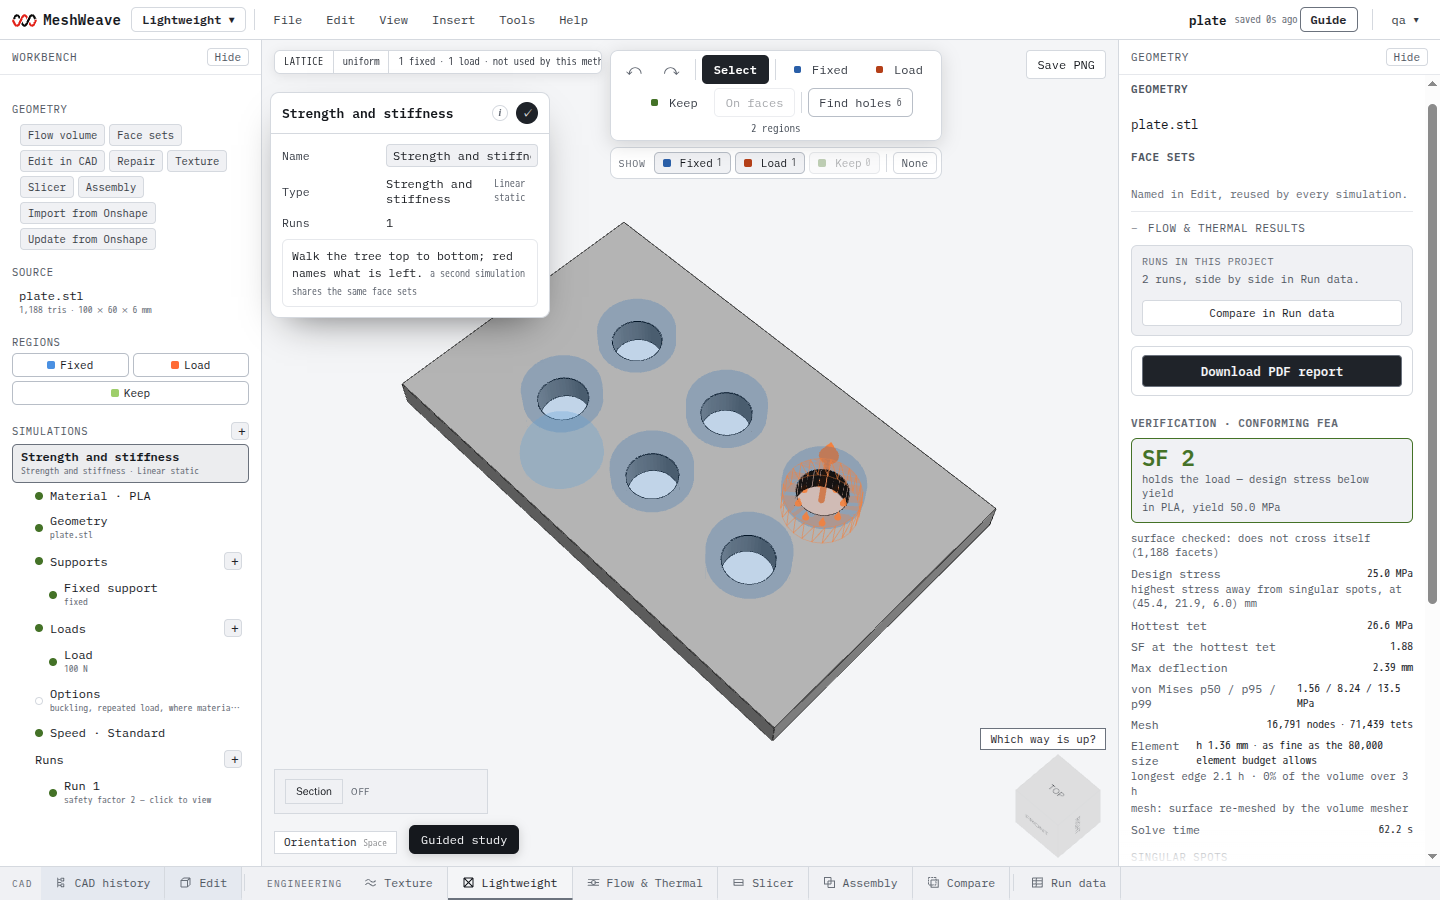
A strength simulation set up on the sample plate: the tree on the left, the supports and loads drawn on the part. - Set Material to what the real part is made of. Show me in the app
- Click the Fixed support row, then click the part where it is bolted or clamped. This is your fixture. Show me in the app
- Click the Load row, click where the force goes in, and type the force in newtons. Y is up. Show me in the app
- Open Runs, keep Standard, and press Start run. It costs 3 credits; cancelling gives them back. Show me in the app
- Read the Safety factor and Maximum deflection chips, then pick Stress to see where it works hardest. Show me in the app
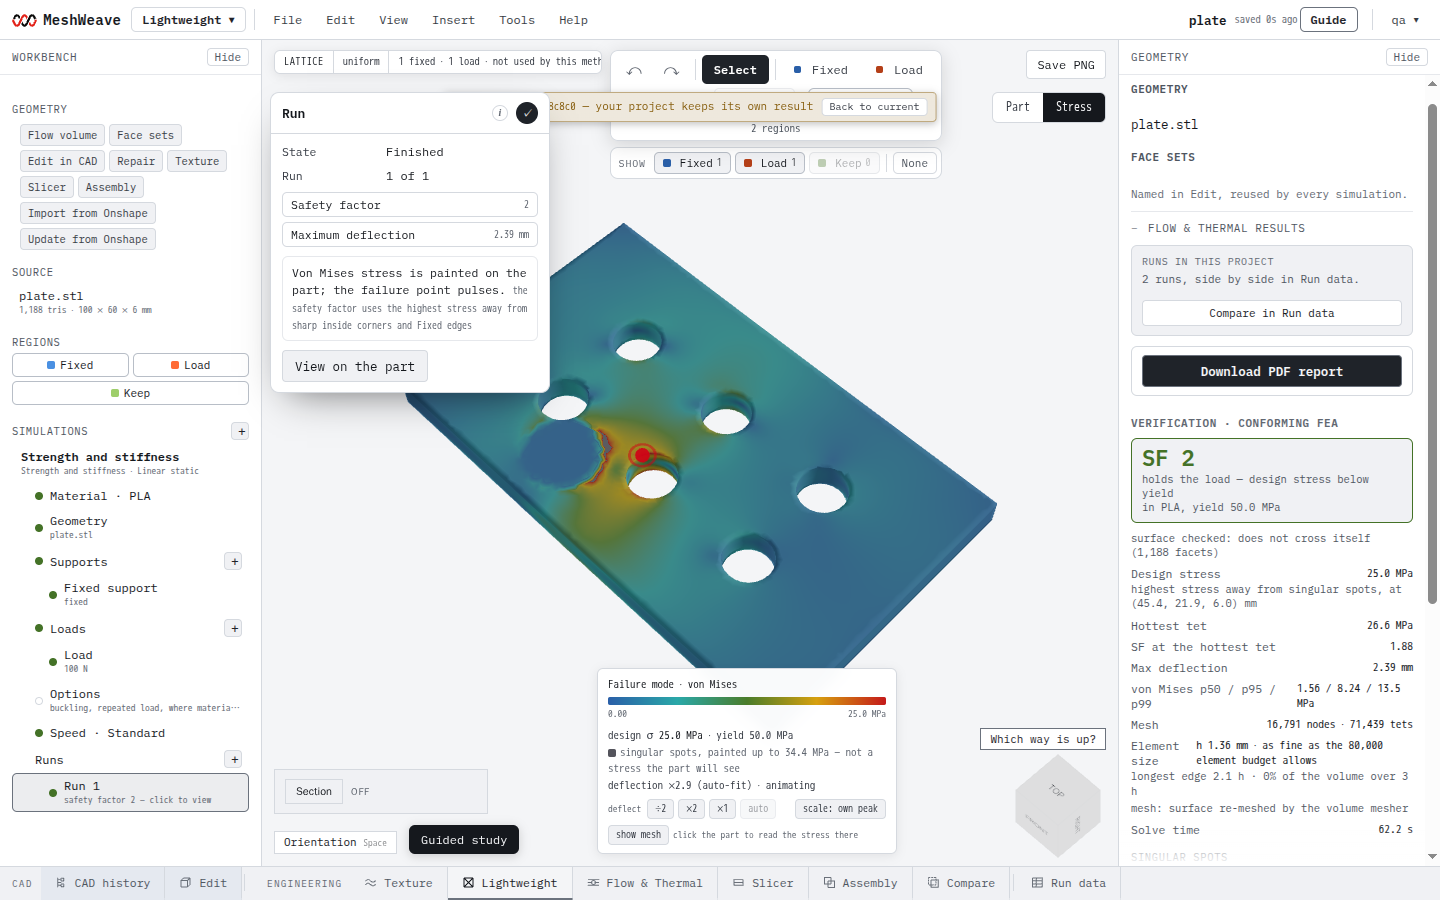
A finished strength run opens on its answer: safety factor and deflection as chips, stress painted on the part.
Frequency, buckling, thermal and fatigue
- Frequency
- Add a Vibration simulation with the same supports. You get the first six natural frequencies, each mode shape animated on the part. 3 credits.
- Buckling
- Tick "Also check buckling" on Strength and stiffness. It runs second and gives the load multiple at which a wall or member folds, with its shape. 3 credits.
- Thermal
- Steady conduction: mark where the heat goes in and the face held cooler, then read the temperature map, the hottest point and the thermal resistance. 3 credits.
- Fatigue
- Under Strength and stiffness options, Repeated load takes a measured force history and the S-N curve you type in, and gives the life. The answer is only as good as that curve.
- For a heat check, set the part's material and the air around it, press Heat and click where the heat goes in, then Temperature on the face bolted to something cooler. Show me in the app
Interference and contact in an assembly
If you used to check interference and set up contact before a study, the closest step here is Assembly prep, in Edit under Prepare. Open the assembly with its part files and it can leave components out, measure and cut the interferences between their exact solids, imprint the faces where two components touch so they share one face, and solve the result as one part.
It needs the part files: a component opened without its part file has no exact solid and is left out, and the dialog names it. Imprinting does not join bodies; each stays its own, sharing only the touching face.
Finding material you do not need
Once a strength check is set up, Where material can come out (in its options) runs one solve that paints which material carries the load and which is spare. It costs 1 credit. Blue is spare for this load only; it may still matter for a load you did not enter.