Notebook blocks, as MeshWeave choices
There is no notebook to wire. A project holds one part, the choices you made on it and every run you made, so going back to an earlier lattice is opening an earlier run rather than re-executing a chain.
| What you build in nTop | What you choose in MeshWeave |
|---|---|
| Unit cell block | A cell picked from its picture in Design space |
| Lattice from a body and a cell | Method: Lattice. The cells fill the part; its outer faces stay |
| Cell size and beam thickness inputs | Cell size and Strut radius, in millimetres |
| A thickness driven by a stress field | Method: Stress-graded. Struts thicken along the load paths from one strength solve |
| Boundary conditions for a static analysis | A Fixed support and a Load, placed on the part |
| Static analysis block | A Strength and stiffness simulation |
| Modal analysis block | A Vibration simulation |
A uniform lattice fill
- Press New project, then Choose a file… and pick your part. In the tree, press + on Simulations and pick Design a lighter part: it opens the Lightweight panel. Show me in the app
- In Design space, under Method, pick Lattice. Show me in the app
- Pick a cell from the pictures, then set Cell size and Strut radius. Show me in the app
- Press Apply lattice. The price, 1 credit, is above the button. Show me in the app
- Turn the part around and look at the lattice inside it before you trust any number. Show me in the app
A field-driven lattice
Where you would build a field from a simulation result and map it to beam thickness, pick Stress-graded instead of Lattice. It needs a Fixed support and a Load on the part first, runs one strength solve, and thickens the struts where the load runs. It costs 5 credits.
- Follow the uniform fill above, but under Method pick Stress-graded; the walkthrough names it beside Lattice. Show me in the app
- Place a Fixed support where the part is held and a Load where the force goes in, with its force in newtons. Show me in the app
- Press Run stress grading. Show me in the app
Checking the result
A lattice run is not a strength result. Check the lattice part the way you would check any part: a Strength and stiffness simulation for the safety factor and deflection, a Vibration simulation for the first six natural frequencies. Each is 3 credits.
- Press + on Simulations, create Strength and stiffness, set the material, place the Fixed support and the Load. Show me in the app
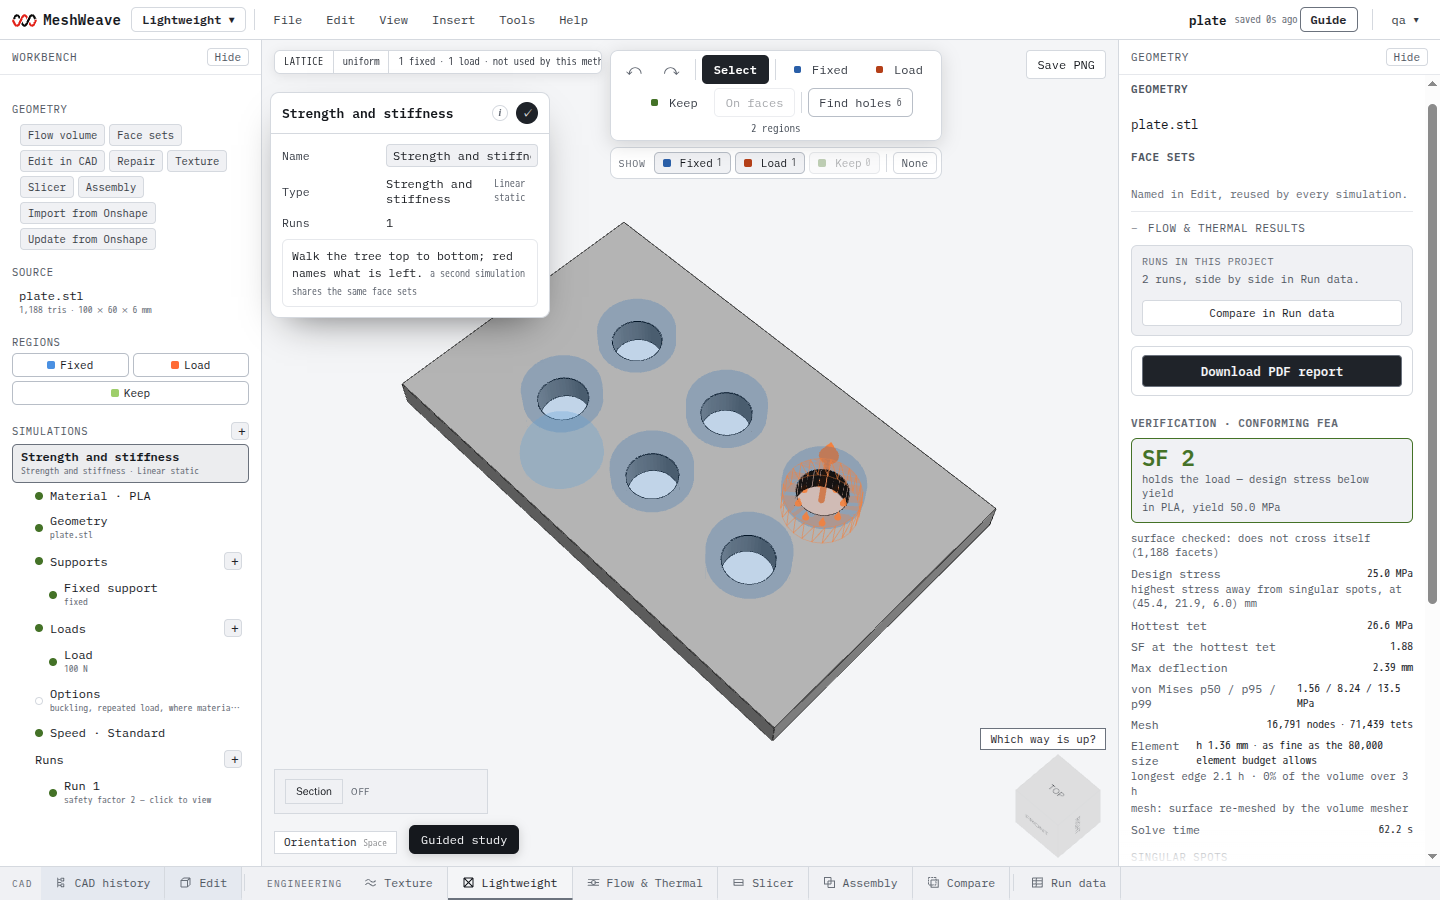
A strength simulation set up on the sample plate: the tree on the left, the supports and loads drawn on the part. - Start the run, and read the Safety factor and Maximum deflection chips. Show me in the app
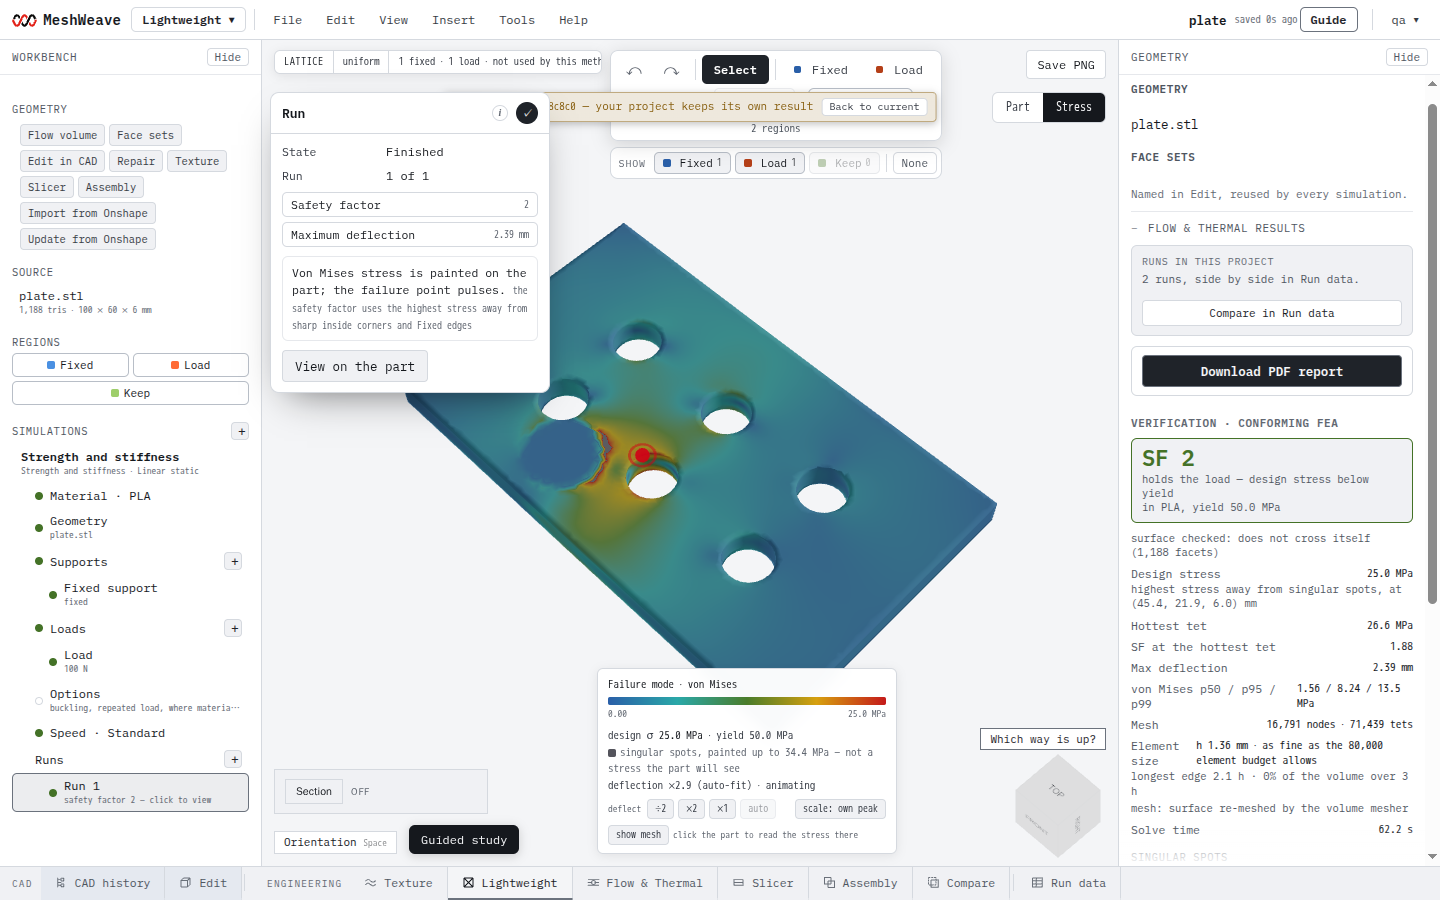
A finished strength run opens on its answer: safety factor and deflection as chips, stress painted on the part.
Before you lattice a part at all, Where material can come out (1 credit) paints which material carries the load and which is spare, which is a quick way to decide where a lattice belongs.